Solar & Storage Market Podcast
Solar & Storage Market Series ft Growatt Storage
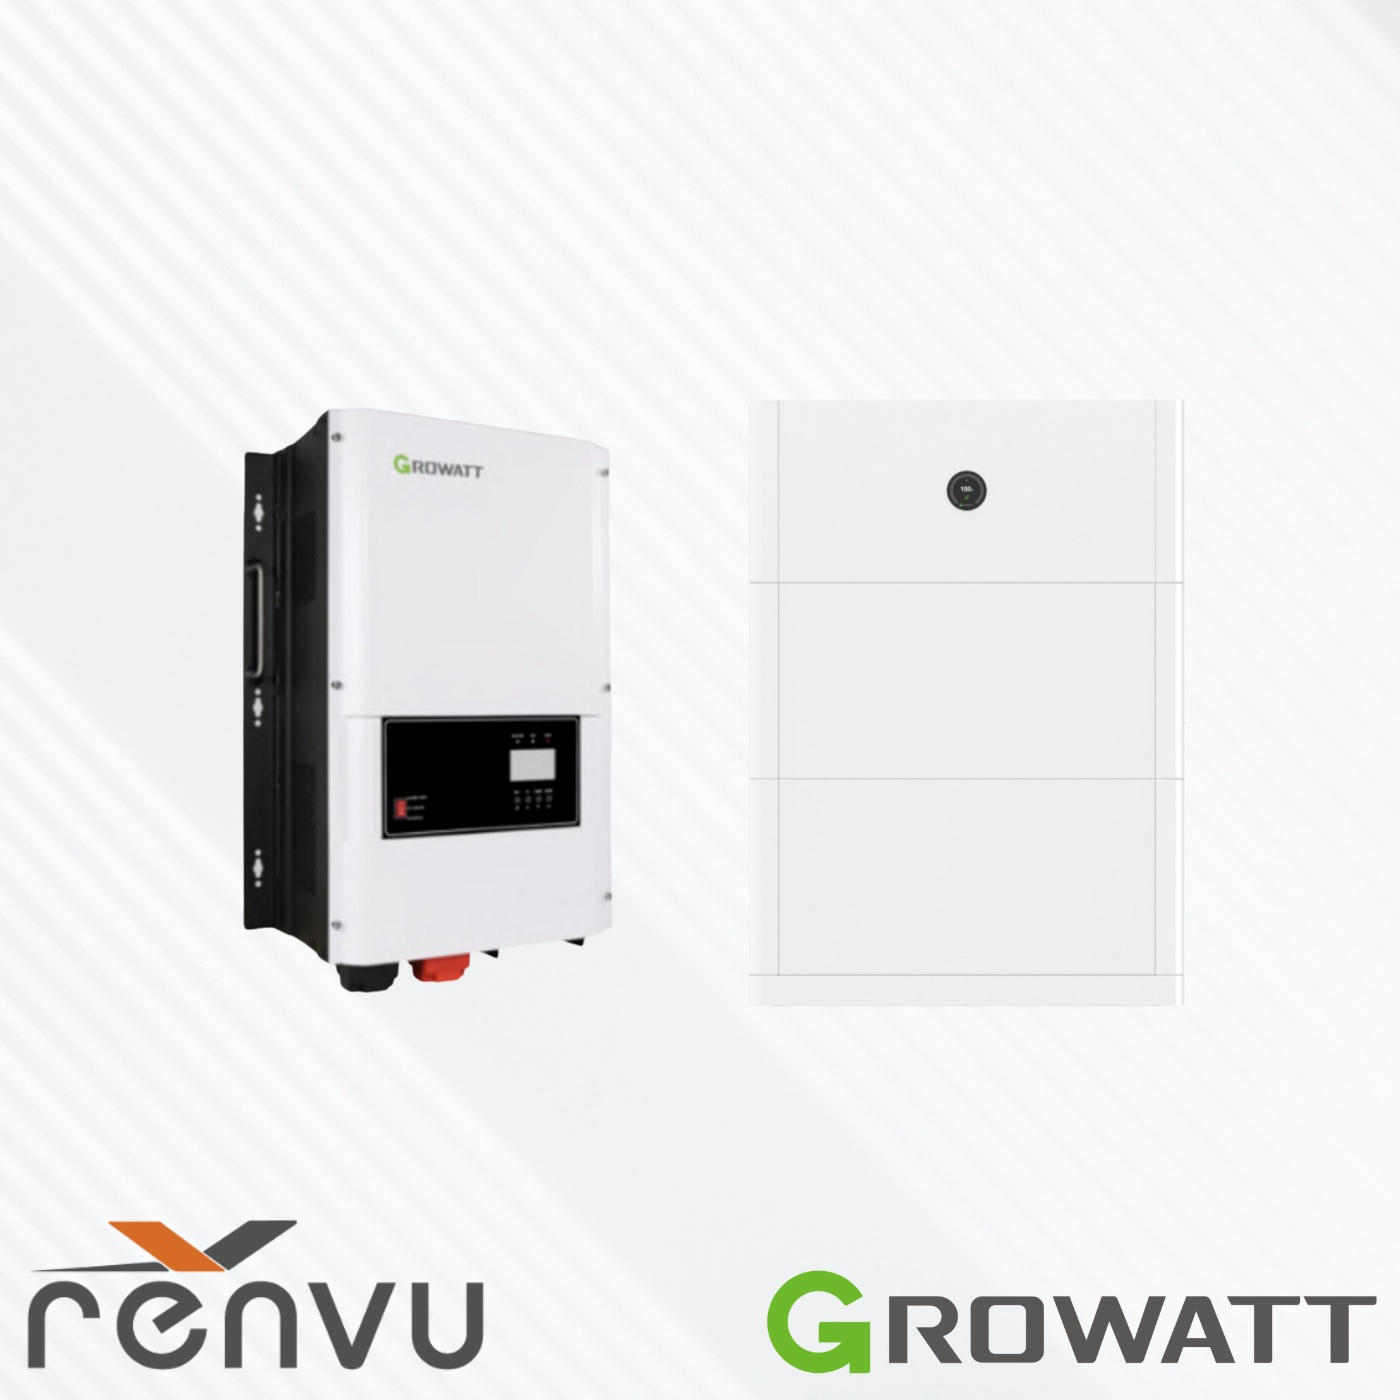
(soft music) - Okay, hi everyone. Welcome to the Solar and Storage Market Series. My name is Eris Dolev, and I'm the Managing Director here at Renville. Today we're going to be hearing from the grower team, Dave Dean, Product Marketing Manager, Tyler Young, and North American Marketing Manager, Ryan Gravel, the Senior Service Manager, and Fermi Pirio Povar, a field application engineer about their off-grid and hybrid inverters and batteries, and have a live commissioning of the MIN hybrid inverters. But before we dive in, and while we're waiting for more people to join, I'd like to give a little background on Renville, as well as some of the products and services we offer. Renville is a U.S.-based solar equipment distributor. We've been in the industry since 2012, and we currently have a fulfillment facilities in California, New Jersey, and Texas. Our sales staff all have background within engineering and solar installation. Few products quickly to spotlight here. We carry the whole solar portfolio and can beat any price you see out there. We recently had a webinar with Lumen, smart panels, and carry their outdoors and indoor models on the shelves. This is a great device to add to a solar and storage project since it allows you to use the existing MIN and SAP panels and control the loads remotely during car outage or set rules for which loads will continue to work and which ones will be dropped. We have plenty of Zenshine 405 black modules, which we are offering at 16 cents when you're buying them with a Blickier carports. We have the whole portfolio of N-phase IQ8 series and offering the IQ8H at 25% below the market price right now. So check in with us if you are using those. Grow out, release their EV chargers forward, which all UL certified and have 50 amps output. We're also adding Grow out pre-phase hybrid inverters option now. So let us know if you have any project that can use those. And if you are looking for T gaskets to make solar arrays water type, Blickier has several options for different models to seal the gaps. Email us at the info@trendwith.com or see our webinar follow up email with more info on those. Here's our bulk module price list for large volume options and our upcoming offerings of solar modules. We carry Zenshine, Canadian solar, Hyundai, Hyperion, REC and more. All our brands are Bloomberg Tier 1. We are sharing in the chat now a link to this page. We update it regularly so you can stay up-to-date with our latest deals for bulk orders. I'll take a minute to also mention the Blickier residential carport. This is a great way to expand existing solar systems or an alternative solution where you cannot install solar on a roof and when customer is looking for more added values, like protecting their cars, shading can be a patio canopy. It is designed to be assembled by a small crew. It doesn't require any specialized or heavy machinery to install. This is a solar structure, so it's eligible for the 30 percent ITC and possibly also the extra 10 percent for U.S. made product. It is modules and inverters agnostic. It is designed and fabricated in the U.S. and made from U.S. source galvanized steel and comes with 25 years warranty. The structure is coming with a structural engineer P stamp and you can install up to 24 solar modules with four columns of six modules, a two-car carport will generate about 10 kilowatt power. You can use residential and commercial modules with it with load capacities of up to 48 honkers per foot snow, 250 miles per hour wind load and seismic design category S. One last item to go over before we start is our solar design and flow tool. You'll find it at the top of our home page on rainbow.com. You can generate as many quotes as you need in a couple of minutes without the need to wait for a sales engineering available 24/7. Always updated with the latest products and pricing. First, you select the components you'd like to see on your quote and choose your panel. I chose the Zenshine 405 black. Then you configure the racking system from wide range of options, tilted flat roof, ground mount and carports. I created a first array with two rows. First row will be with seven modules in landscape. Then the second row I'll put 10 modules in portrait. The second array with another row of 10 modules in portrait. I'll change the rails to black and black clamps as well. Then the span to six feet. The system creates a sketch of the arrays with the dimensions so you can verify that this design fits the space you have. Then choose your inverter type from micro inverters, optimizers and string inverters. I'm selecting string inverters and storage option. I'll select the string phase, single phase and then grow up. Select the MIN 10K here and I'll select the 19.8 kilowatt hour arrow. I go optimizers. On the left side, you see the bill of materials building up. When you are logged into your account, prices change as you edit your system configuration. This is a great way to compare the cost of different options in real time. Our team updates it regularly. You can see already the bill of material and pricing and when you generate what it will send it to your email and it will also add it to your my account where you can edit the quote printed or place your order. I encourage you to take a moment and play around with it. It's interesting to compare options and contemplate different design configurations. If you have any questions about these products or about Growat while the Growat team is presenting, please feel free to ask in the Q&A section and we will get to do the questions at the end of the webinar during the Q&A session. You can also email our sales team at info@rendvoo.com for more information and pricing. The webinar is being recorded and we will send you a link in follow-up email. We also have recordings of previous webinars on the Randvoo YouTube channel. Without further ado, I will hand it over to the Growat team here. Stop sharing. Thanks a bunch. Much appreciated, Eris. And I just wanted to start off by saying that Randvoo's system design software is amazing and lovely. It's awesome that because a lot of them are like, oh, you can see that this particular device is compatible with this other device, but yours has real-time pricing and things like this. Very simple thing to go through. So yeah, love that on your website. So I'll go ahead and get started with the Growat portion of the presentation here. My name is Tyler Young, the North American Marketing Manager. Also on our team, we have David Dean presenting right behind me. He's the North American Product Marketing Manager and then we have Ryan Gravel presenting after him, who is the Support Director and Furman as well from the Field Application Engineer team. He's here and going to help with any technical questions you guys have. So let's get started. I just want to go through my background here. I'm currently in our testing lab and facility warehouse in Los Angeles, California. You can see some of our products around. This is our newly launched SPH hybrid unit here. Dave is going to be talking about this one. Back here, we have our EV charger that Renvoo is currently selling as well. And then off on this side, we have our residential system. This is the SYN transfer switch, the MIN inverter right there. And below it, we have both our ARO battery, which Renvoo currently has in stock, and then our new APX battery as well. So without further ado, I'm going to go ahead and share my screen and do a bit of an overview of our 2024 products lineup. Then after that, I will do a live commissioning of our residential MIN inverter. So you guys should be able to see my screen now. Let's get slideshow going. Okay, there we go. Smart energy storage solutions from GrowWOT, 2024 product line for the U.S. market. GrowWOT's overall business focus. We have four primary categories, PV inverters, energy storage, EV chargers, and smart energy management. GrowWOT as a company has had sustainable growth over the last decade plus that we've been in business. We have over 1.9 million cloud users and a 3.1 million annual inverter production capacity at our manufacturing plant in China. And we are in 180 countries across the world. We have more than 5,000 employees, more than 1,000 engineers, and nearly 5% of our revenue is reinvested in R&D. This is our manufacturing center. Again, also 3.1 million inverter capacity, but in addition to that, we're producing battery packs, 400,000 per year as well. And we recently opened a new manufacturing center in Vietnam that's just this year. Our global presence, again, 180 countries, we are the largest residential inverter supplier in the world and top four PV inverter supplier as well. This is our team, team members in the United States. As you can see, we have field application engineer like Fermine, who we have on the call here. We also have sales, product managers like Dave, and of course support, which Ryan will cover. Number one, residential inverter supplier, top four PV supplier. Again, in business, for more than a decade, founded in Shenzhen, China, launched our residential energy storage solution in 2015, came to the US very soon after, and our goal overall is to build the world's largest intelligent sustainable energy ecosystem for humankind. So, a bit of background on all of our products for the 2024 lineup. Of course, we do all of the usual suspects. Grid tie, partial home backup, whole home backup, and off grid for time of use or anything like that nature. Our MIN inverter is a streamlined design. We have multiple power ratings from 3.5 to 11.4 kilowatts. They're very lightweight. Installers like them, very easy to install in roughly 15 minutes, sometimes less even. And the commissioning takes about 15 minutes as well. They're dustproof, waterproof, outdoor rating with a 10-year warranty. And of course, the MIN does whole home and partial home backup as well. 50-volt minimum startup voltage and four MPPTs for diverse roofs. Our MIN series has rapid shutdown with TGO inside, and a 2.0 DC to AC ratio. So, you can have 20 kilowatts of solar coming in. 10 of that can go to the battery, and the other 10 can go to the grid. And that allows you to go past the inverter's sort of rated capacity, which is amazing. Again, this is our brand new APX battery. Anywhere between 5 to 30 kilowatt hours, so it's completely scalable. White temperature range, IP66 design again. They're stackable. They also can be wall mounted. And you can mix old and new battery packs, which is great. There's a smart software, which basically optimizes the balance between them. So, there's no precharging or anything that you'd need to do for any of our battery products, which is great. This is our ATS for partial home backup. Again, 10-year warranty, NEMA forex rating, dustproof, waterproof, so it's outdoor rated. Same with our SYN, our whole home backup solution, and includes a 200 amp breaker or whole home adaptability, and can be DC coupled. There is, of course, on our MIN, a pre-PTO mode, which makes a lot of sense when your installers installing several units and need HJ or regulatory approval before actually doing the commissioning, so you can show up on site, get everything ready to go, put our inverter in pre-PTO mode, and then not have to go back to the site, which is amazing. And then, of course, with all of our inverters that would be grid tied or even off-grid, you can maximize self-consumption, export limit application back to the grid, or do time-of-use arbitrage in a place like where I'm at in California. Our off-grid products, which Ryan is going to cover a bit more about, single-phase, this is our SPF single-phase 3,000 to 3,500. Very popular across the world. SPF 6,000 to 12,000, again, split-phase output, generator compatible, and then our AXE modular low-voltage battery, scalable from only 5 kilowatts, all the way up to 400 kilowatts for light commercial use, things of this nature. Dave will be taking over the SPH presentation directly after this one, 10,000 watts, NEMA Forex rating for outdoor waterproof as well, and that's compatible with our also new ALP battery system, low-voltage battery system, again, flexible stackable up to 240 kilowatt hours. The SPH is a 1.5 DC to AC ratio, so you can input 15 kilowatts of solar, output 10 to the grid, and 10 to the battery, even though it's a 10,000 watt rated inverter. Then we have a commercial system as well, and we're very excited to be entering the CNI space because there are not a lot of competitors, particularly offering the types of solutions that we are at the prices we are, which is amazing. We have four WIT inverters from 28 to 100 kilowatt hours, and then our APX battery system as well, which you can see on the left, stackable up to 200 kilowatts, I believe. You can, of course, maximize self-consumption, and this depends on your CNI usage, or needs self-consumption, peak shaving, demand charge, just depending on what's going on on your local grid. You can set up a micro grid, and you can use it for power quality if you're having a lot of generators or things like this going on. Of course, use it for backup or possible to mount outside or inside. We do recommend you put shade over the CNI inverters, but they are very flexible and outdoor-rated. Again, it has that same modular battery stacking, battery mixing, so you don't need to recalibrate batteries. If one fails, the others will make up for it, and you can just add a new battery to the stack, basically plug and play, which is amazing in what we're aiming for, easy solutions for the U.S. market. Of course, we recently launched our portable power station division as well. Our portable power stations go direct to consumer compared to many of our other products, with which are distributed through our distributors, like our lovely partner Renvoo here. This is our Vida 550, one of our smaller units, half a kilowatt hour, and we launched these products at a time when these are becoming very popular, particularly during the pandemic. People wanted emergency power, they can be charger solar, or the wall outlet, or a car charger. This is our larger 1300, and we release these products similar to many of our others at top of the line specs. We really only compete with one or two other companies in this area, and we're happy to say it charges one hour to 80%, or 1.6 hours from 0 to 100. These super fast charging times, whether from AC wall outlet or the solar, that's really what makes these units at the top of the line. Our new Infinity 2000, which also has an RV plug, people often use generators in their RV, our Infinity 2000 can be swapped out immediately, and used to power things like air conditioners or mini splits, especially in an RV application, or even construction off-grid application as well. And the 2000 is expandable, those expandable units are going to be available on our website within a month or two. Then upcoming, we have a 3.6 kilowatt, and again, stackable, expandable portable unit. This is going to be for tiny homes if you need portable power. I know we have a company that's looking into some actually military applications, so that's very interesting, and here's the whole range here. Of course, Renvo is familiar with our EV charger. We have an AC EV charger and a DC EV charger, level two and level three charging, 2.5 hours and 1.25 hours for the 40 kilowatt charger. And that is a DC charger, so one's AC, one's DC, and four can be used for multiple car households or even smaller commercial applications in the EV charging space. So we're really excited to launch the 40 kilowatt charger this year as well. PV linkage mode, your EV can be dynamically charged by surplus energy only, compared with every single type of EV as expected, manual boost mode in case you need to get home and charge up immediately for another trip, and smart boosting to optimize the PV and everything while you're charging up your EV. You need an additional CT for doing load balancing, but it allows the inverter to not be overloaded and the EV can soak up some of the extra PV coming through. And I am going to go ahead and turn it over, actually no, before I turn it, well, we'll do the live commissioning after Ryan's portion on the MIN. So yeah, I'm going to turn it over to Dave, and Dave can begin presenting now. I'll stop sharing. Let me get set up here and start sharing. Okay, please let me know if you do not see my screen. My name is Dave Dean. I'm a product marketing manager with GrowWatt, so thank you for being here today, and thank you for Renview for co-hosting this with us with GrowWatt. I am going to go through one of our new products that's really actually just now being launched. Really, I'll say Q3, which basically is the end of this month, right? So, called the SPH-10,000. You can see the whole part number there, but it's just to give everybody kind of a quick overview. It's our low voltage solution, right? So it's a 48-volt solution. It's compatible with both lithium batteries and with lead acid. For those of you that are familiar with Solark, especially through Renview, very similar to some of those products, and I want to kind of walk you through what are some of the nuances and the differences between the products, but we're really excited to launch this new product called the SPH series. Let me make sure I've got it over here and can get down. There we go. This is obviously not the whole spec sheet, but just a real quick view of kind of a high-level view of what's going on in the SPH. Again, it's a 48-volt system. It has three MPPTs. You can do two strings per MPPT. It's got a lot of really good, strong specifications. And again, without reading each of these, I'm going to get into kind of a comparison here in just a moment so it can compare against some of the products that you're already familiar with. Here's an overview of kind of how it's hooked up. It's really not specifically designed to be a whole home backup. It's really more of a partial, more of a protected load backup where you've got a protected load panel. But it can be because you can parallel systems together, which does provide a whole home backup solution, but this is kind of an overview of just to give you a feel for very, very specific, very general. Let me try again. Very like all the things that you're already selling or already installing. As Tyler mentioned, we do have one of the batteries that's compatible that grow out sells as the ALP series battery. It's modular in design. It works great with the SPH. And you can see the specs there. It has 9540A. It's indoor, outdoor rated, five kilowatt hours per module. And you can go up to 400 kilowatt hours. And again, we'll get into this in a little bit more as we talk more about the inverter. So quick overview. The SPH, you know, inverter does have an LCD touch screen. So pretty much anything that you can do on an app, you can also do in the front, right there in front of the unit, which is awesome. It has a lot of different working modes, you know, different energy modes to be able to fit any application that you're looking at. It has, you know, it does AC coupling, DC coupling. So it's great for retrofit applications. As I said before, it will support lead acid batteries and lithium batteries. It's also compatible with generators. And of course, it's outdoor rated. And you can see the temperature range that it will operate and the warranty, strong warranty. So why buy this one, right? There's a lot of options out there. Why buy the SPH? And I've just pulled out a couple of things here that jump out to me. And then we're going to literally do a comparison. But it's, you know, it's a really, the good news is an inexpensive hybrid solution, both for good for good for on grid and off grid. And in this solution, you're not forced to pay for things that you may not want or may not use. And we'll talk about that in a moment. It's easy to install. You can do it from the touch screen. You can do it from the app. It's easy to commission flexible operating modes. And again, we talked about some of these others. You can have up to six inverters in parallel. And it's just a real workhorse out there, right? If you just want something that's fairly inexpensive, but we'll get the job done, that's where this one is targeted. I like to compare it against something that you guys probably already know. And I'm going to say, you know, in addition to offering GrowWatt, you know, as I already mentioned, you know, Renvue offers a good selection of 48-volt inverters with some good companies like Fortress Power and Solark and others to fit lots of different applications and budgets. So why install the GrowWatt? Basically, this isn't your typical product comparison where we as a manufacturer say, okay, let's handpick the specs and really want to compare. And all of a sudden, magically, GrowWatt becomes the best of everything, right? Every manufacturer can do that. They can hand pick the specs. But what I did is I wanted to be real, and I wanted to show a handful of specs that you could actually see the differences. Good and bad. And then we'll get to the bottom why then GrowWatt. But if you look at it, for those of you, of course, that are already doing with business with Renvue, I believe you guys sell the Solark and the Fortress. And those are very similar. And you can see the PV input. You know, you can see that they're pretty similar across the board. GrowWatt's a little bit less than the others. Number of MPPTs. Three right across the board. I put a little asterisk next to the Solark because as you go down in the Solark line, like the 12K or less, you get two MPPTs. So I'm trying to compare the GrowWatt against really probably some of the nicest units that are out there today with the NV and the EG4 and the limitless 15K. So just to give you a real feel, and again, we don't always win in every situation. But I want you to see how close almost everybody is and then where the value comes to play here. MPPT max voltage. You can see right across there. GrowWatt is right in that happy middle of the others. The startup voltage, we're a little bit higher on that one. Max input current per MPPT. I wanted to point this out because although the other inverters, the ones that you're probably familiar with, have 25 amps, you know, on MPPT number one, then it's 15 amps and 15 amps. That's the same way you can see on the limitless. It's 26 and then 15-15. On the fortress NV, it's 25 and then 15-15. On the GrowWatt, you can see it's 22 amps across the board. So who wins or whatever? Again, very application dependent on that. Maximum charge discharge current. You can see we're a little bit lower on that. But again, in the ball game, for sure. All the certifications, all the compliances of all of these are basically the same, right? They can be installed in Hawaii, they can be installed in Puerto Rico, it can be installed in the U.S. and has all of the certifications you would expect with leading inverters. One of the things I want to point out is maximum units in parallel. Well, you can see GrowWatt has 6, others have 10. The Solaric Limitless has 12. If you go down in their product line, it actually goes to 9, I believe it is, units in parallel max. I point this out because this is great. And if I were trying to compare and I were a different company other than GrowWatt, I would say, look, we can do more in parallel. But in reality, very, very, very few installations, are more than six inverters. So really, we end up covering about 98% of the installs anyway. And on those unique situations, you could, of course, go to a different option. I did pull out weight here just to compare. Weight, when you're lugging things around, you're installing, you're lugging things around every day and you've got to pull things in and out of trucks and vans and hang things on the wall and stuff like that. Even 10, 20, 30% difference being lighter in weight makes a difference. So I like the ability that GrowWatt has from a standpoint of being able to manhandle it and be able to put it and handle it and put wherever you need to. I brought this up just because it was a little bit something that not everybody had. And that's that arc fault circuit interrupt. And interestingly enough, on the fortress envy, they do it as optional. All the rest of them say, yep, that's part of it. The total harmonic distortion. So anything that you're trying to, if you want to make sure that the lines are clean and there's no distortion on that, basically, if the lower the number, the better on this. So I wanted to pull that out as well. So what am I trying to show here? What I'm really trying to show here is that the SPH, the GrowWatt really is representing value. If you look at it, all the specs are very similar. Yes, some are better, some are worse, but you're with the GrowWatt, you know, it's all about positioning the product for the right application with the GrowWatt. It's less expensive, sometimes half the cost of others, just to give you an idea, but it's less expensive than other options. There is no being right up front. There's no 200 amp wiring box that I know the envy and the EG4 have, for example. But sometimes you don't need that. Sometimes you don't need all of that extra hardware. Again, depends on the application. So you're not paying for that upfront with the with the GrowWatt. And again, just to make sure that just to emphasize, reemphasize has the same certifications, same number of MPPTs, and it's easier to handle because of the because of the lighter weight. So again, this was an interesting thing. I'm taking a chance putting this out here because GrowWatt doesn't look the best in every situation until you compare it from a price perspective and what you get from a value perspective. So I encourage you to do that and really look at that as a possible option. We went through some of this. I mean, it's got a quick transition time of 10 milliseconds. Others do have 10, some are at 20, some are at four. So again, right in that, that meaty middle, I'll call it. You've got three MPPTs. We talked about the charge, discharge current. A lot of these we've already mentioned, six units in parallel. It does the last bullet. It does support three phase systems. And we'll talk about that. I've got a diagram that I can show you there in just a moment. And we can also answer questions on that in the Q&A if you have more questions on three phase. The touch screen, again, everything's available from the front. It's all touch screen. You can look at it. You can see what the status is, whether it's on grid, off grid, you know, obviously time and what the production and things like that look like. You can also use this screen to do grid settings and change operation modes and, you know, anything that you want to be able to do from the app, you can do from the front screen as well. Tyler did hit this screen already. It's even though it's called a 10K, it can actually bring in 15K of PV, 10K of which can go to the loads, 5K of which can be directed to charging the battery. Multiple MPPTs, very flexible. Again, very good strength of the SPH product line. You can do one string per MPPT or you can do two strings per MPPT. And that's really what this is showing, again, to be able to cover shading or different, you know, different areas of the roof or whatever, unique situations and this will allow you to make the best configuration of that. Safe, reliable, all the safety listings and I won't necessarily go through all of these, but, you know, you can see the words protection, protection, protection, monitoring, protection, protection. I mean, there's just anything you need from a safety perspective is there. And again, what I'm pointing out here is that these are the same things that other guys offer, but we offer it at less. The SPH, we have up to six in parallel. This one happens to show three, but obviously that gets up to 60 kilowatts if you put six in parallel. On the three phase, we've got the ability to do 123 phase and 208 three phase. And again, we can get into this. If you guys want more details on this, it's in our install manual as well as we can handle this at the Q&A at the end here. Give you a quick overview of the hardware. This is a close up shot of the, you know, of the area where you would do the wiring. And you can see in the upper left hand corners where the batteries would connect. I'm just going to hit these really quick. This section right here toward the bottom left is where your PV lands next to that to the right is where your grid or your generator, where your grid connections come in, your generator if you had one, and then the loads would go here. You've also got some RG45 connectors here, which is for your communication from your battery to the inverter. And that's really about it. And there's another connection over here, which will, I've got some blow up pictures of this so you can see it a little bit better. Here's the battery connection. I won't read this, but basically, this is where it goes. You've got another set of connectors here. So if you need to parallel some batteries, you can and, you know, easily. And then also it's a 48 volt system. So you can see the voltage range there and then, and then suggested wiring to use for that. And again, this is all in the install manual and or a quick, quick reference guide for you. Communications from the battery to the inverter. If you have a lithium battery, then obviously, and I pointed that out before, there's an RG45 connector right here. And you can use just a like a cat five that goes, you know, connector that goes from the battery, from a communication side, from the battery to the inverter. And then on the, if you had a lead acid battery, then there is a an area and I'll show you where this section is here in a moment, but there's an area where you can set up the temperature sensor for lead, you know, for lead acid batteries. And there it is. So again, this is a picture of the unit, but off to the left side, there's a little, you know, some some connectors there. And that's where you basically all of your low voltage stuff goes, you know, connects, whether it's your CTs, whether it's your generator, you know, on and off signal, and as well as the temperature sensor, if you have lead acid batteries. So that's where that all connects. And then your PV connection, again, won't go through all of this, but it does suggest what kind of wire to use and where those land. And it's easy to get to the areas big enough to get your hands in there without being too cramped and makes it makes it for a quick installation. Your AC connections, you know, for your grid and your generator or all your input and your and then of course your load output for that. And again, it suggests what what size wire to use and how to strip the wire and all that kind of stuff. But this is where those wires land. Let's get into some of the some of the cool stuff about it. You know, one of the things that makes SPH unique is that there's lots of variable lots of ways to program the system, to set the system up to create different parameters so that it will operate in different scenarios. And I know, and I'm going to hurry because we don't have a whole lot of time for others to present. But you've got very similar, if you're familiar with the solar, the screen should look somewhat similar and feel, you know, feel very similar as far as the ways you select, make selections. This allows you to do on grid, you know, self consumption, you know, zero expert mode, export mode, you know, what's the priority of, you know, PV then grid then battery or do you want to change that allows you to say I want the PV to to first power the load or I want the PV to first first charge the battery. You know, just so all sorts of stuff, everything's available here to be able to change. The installment is pretty clear to walk you walk you through those scenarios. Self consumption mode, same thing, you know, again, you just choose self consumption mode, you've got a couple of options there, whether you want battery first, load first and, you know, that kind of thing and again, fairly, fairly straightforward. Zero export, same thing, I'm just going to keep moving on if you guys are okay with that. Time of use, there are five, I'm sorry, six time of use windows and, you know, time of use, obviously you can, you know, set the time when when you can, you know, set the time period to implement the setting, you can set the battery charge from a voltage perspective or a percent or a state of charge percentage. You can, you know, tell it whether you want to use the generator to offset the shortage when the battery is down and less than the value that you set here. So again, lots of different options, which makes it great because that way you can set it for any application also makes it a little bit complicated sometimes because there are so many options. But again, everything is fairly straightforward on how to, how to make that happen. Peak shaving, same thing, you would, you can see the red bar there, you can set grid peak shaving, you can say the maximum power and, you know, that, that you, you want to, you only want the grid to go to that level. So you can always be sure that you're not, you're not going above that and, and getting, getting xx charges from the utility. Generator setting, again, it's compatible with a generator. You basically say, you know, how it works, you know, what percentage you want it to, to charge at, you know, you know, gens, you can, you know, optionally select things to say generator charge. If it's enabled, the generator will charge the battery or the generators on. Again, pretty, pretty cool setup from a generator perspective. This is probably the most, I got the call it the classic setting. This is probably the setting that's used the most. And again, this would be, it's like, okay, choose this, select this, put this in here. And, and this is probably what's used the majority of the time out there for installations. And that was it in a quick overview. Thank you for your time. I'm going to stop sharing and pass this over to whoever is next on this. Thank you guys. Thank you all. And that said, and thank you, Dave. That said, this should be jumping over to myself. Again, as mentioned earlier in the presentation, my name is Ryan Gravel. I work with the service team here in the US and Canada for GrowWatt. I'm going to be going over our off grid product selection, as well as our min hybrid solution, which is more of sort of your turn key application here in the States. But that said, happy to go through these with everyone. So as mentioned, the first topic will be off grid solutions. Basically, we have a few slides that sort of overview the interconnectability of the systems of flexibility. As mentioned, the off grid products, well, they can be tied to a utility grid are mostly focused around single phase or potentially split phase application. You can similar to the SPH run multiple units in parallel for more robust solutions. But that said, again, we'll be focusing on items like the SPF TLLVM, which basically the naming structure actually will indicate the function and form of the system. So for example, the system here listed the TLLVM US would indicate that it's a transformer-less low voltage unit has 120 volts single phase output. Again, you can run multiple in parallel for a split phase application. You would want to pair that with an ATS switch. Basically, that will help you get the true split phase output. And the M would indicate an MPPT controller. You will see that across our product line just to ensure maximum efficiency and output of your PV strings. Obviously, like most string inverters, you do want to coordinate your panel arrays and strings by azimuth. You would generally want to avoid east and west-facing panels in the same string just to ensure maximum power output. That said, as we go through here, again, you have a bit of a range here. With the SPFs, you will typically have the three and three point five K models, the three point five and five K models. The SPFs again are scalable because you can run up to six units in parallel. So depending on your application, you do have a lot of flexibility to make sure that you are covering the needed loads. That said, you do, again, have things like the equalization around. I'm charging the ability to connect generator for your outputs. Again, being fully, truly off-grid or grid connected as needed. But again, these systems are focused mostly for off-grid application. That said, one thing I do tend to call out around the SPF product line is these products are typically designed to be installed under some type of shelter, just because they're not quite as high on the IP weatherproofing rating, as say, for example, our min product or the SPH product. Again, most of our customers are typically installing these alongside the batteries and charge controllers, depending on the specific model within storage cabinets or in basements, garages and so on. That said, as we continue to the next slide here. Excuse me. So the SPF DVM MPV. This is a larger scale unit. It goes from four kilowatts all the way up to 12 kilowatts. This one is a true split phase out of the box. So you can have 240 volt output. That said, it does have two MPPT trackers built in transformer. So that way, you can manage your loads directly from the inverter itself. Pretty nice turnkey solution. That said, it has the ability to deal with surge demand and things like that a little bit more than the standard SPF. And these can all be combined with the AXE low voltage battery. One of the great things about the modular AXE battery is, as you can see in the image here, they are effectively stackable. The control wires and power wires would connect in the upper right hand corner of this image. As we quote here, easy installation, 30 minute install. Again, because effectively you're only making one connection at the top of the stack, makes it really easy. And obviously, the modules will auto recognize when connected together, again, making it super simple for install. That said, they're also designed to be less impactful to the environment and more durable by being a cobalt-free lithium iron phosphate configuration. What this is going to help you do is ensure more cycles of the battery over the lifetime of the system. And that said, a battery cycle is considered a full discharge. So if you have three 33% discharge, that would count as one cycle, as opposed to a lot of the lithium polymer batteries, which can sometimes be more susceptible to those power cycles. Let's see here. That said, this is a blown out version showing the stacking and communication wiring setup. Again, designed to be very intuitive and straightforward to ensure efficiency on site for you and your installers. And this here is again just showing the communication over the RS-45 and CAN communication. Again, just trying to lead to expanded flexibility. And that said, I note that we can have this being used with the AXE batteries. But the SPF can also be used with lead acid batteries, other third party lithium batteries, and so on. Certainly, if you were looking to explore the product, you could certainly reach out to our sales team or our service support team. And we'd be happy to speak to you to confirm those batteries. Or obviously, Rengu would be, I'm sure, happy to help you identify the proper battery for your solution. That said, the nice thing about our units is with the standard SPF, you can make sure that you're using full capacity of the inverter as far as doing a full five kilowatt out of five kilowatt unit. That said here, I'm not sure why we have a grow on inverter on the general on the left hand side, but effectively looking at units that sometimes need a third or external charge controller and things like that. One of the nice things about the SPF units in the US is that they do have the charge control built right in. Again, keeping simplicity to your load management. That said, you also have flexibility around your stringing solutions to make sure that you're maximizing your efficiency with wiring on the roof and flexibility around different panel pipes and so on. This here shows the example of a single phase or split phase configuration of multiple units in parallel. As mentioned, you can run up to six units on a single system. And again, they will manage and distribute the power to the loads, the utility of battery. That said, you also have equalization for charging. So that way, as mentioned, you have the flexibility around either charge point charge control or battery management system charge control. So again, giving you flexibility around application and customizing it to your customer's needs. That said, like most solar systems, you'll need to make sure that you have your appropriate tools for installation, your multi meter screwdrivers, amp meters and so on. That said, this one here on the left hand side is showing one of the standard SPF units. You'll typically notice, and actually I believe there's a slide down that'll show how you can uncover the bottom of the SPF unit and access your AC connections, your PV connections, your battery connections and so on. Everything will be on the lower side of the inverter enclosure itself. That said, one thing that has come up in some markets with AHJs is depending on the inspector. Sometimes they do want rigid conduit or troughs underneath the SPF units. We have seen that feedback and we've actually seen a lot of success with running these right adjacent to electrical troughs. So again, depending on your local inspector, you may want to discuss that with them during application. But I'll show how that compares to the MIN series product in a moment where we have built in knockouts in the terminal box built right into the inverter. That said, well, the system is in power. Obviously, you don't want to be disconnecting the batteries under load. But that said, we do limit, we do state that you should have no more than three parallel battery groups on the system. And as noted earlier, you do generally want to make sure that you are being protected from water and very fine dust. Again, it's an IP20 rating for the enclosure. Occasionally, you may have to clean the fans on these. But that said, at the price point, at the value and with the flexibility, we still think there's a tremendous value point to your customers. Again, for both off and on hundred solutions. But again, as long as the inverters mounted somewhere that's not in direct exposure to the elements, you should be fine. And that said, this is just a little table showing some of the wiring and current inputs and limitations. Again, a lot of flexibility depending on what your application case is. We do have quite a variety of SPF products available for your use. And similarly, same thing for the AC wire size solutions. So this one here showing the installation ports and terminals. One of the items is depending on how you're looking to get these. But all of our SPF products also have an optional accessory, which is known as a data logger. It's a little USB based stick, which allows the customer to either connect their SPF system to the cloud via Wi-Fi or 4G cellular connectivity. You can also use an ethernet cable for a manual hard wire connection as well. But that said, we do see a lot of folks that either have mobile homes and RVs with renewable energy solutions that will use the wireless communication settings just for simplicity and flexibility. But that said, again, all the terminals would be on the lower side of the cabinet and accessible by removing the lower most terminal cover. As you can see on the left hand side, it would be below the green line there. That said, the SPF DVM is a little bit larger of a unit, but the terminals are actually exposed on the bottom. Again, this is the one that comes from the factory with a transformer built in and a split phase output available. Again, slightly heavier duty for, again, off grid use. But again, we can certainly provide any of the data spec sheets for your specific application as well as images and installation guides as needed. That said, again, just going over looking at different module types, speaking about how to calculate the optimal string sizing. Generally speaking, unlike some manufacturers, because we're not using module level electronics, you don't specifically have a minimum or maximum number of modules that can be on the string. Really, your considerations are your voltage and current that will determine, depending on the type of module you're using, how you would string those strings to the inverter. And again, we're here as well as I'm sure Renbu is as well to discuss that with you and make sure that you're making the appropriate pairings to get the most out of your system. That said here, this actually speaks again to that data logger dongle. In this particular case, they're showing the Wi-Fi F, which is a Wi-Fi. Oh, it's there's Wi-Fi GPRS terminal, sorry. But effectively, again, that's a USB terminal on the bottom side of the inverter and showing the shine phone commissioning tool, which would allow you to associate the hardware on site with an online monitoring plant if you want to view that system remotely from a computer. Also, again, the shine phone app will locally be able to give you visibility to production, consumption, power transfer, battery charging, and so on. Again, pretty all in one as far as being able to access and maintain your system, which is great. That said here, just showing a setup of a parallel single phase connection, effectively just making sure that you are either having a single inverter or multiple inverters, identifying which machine it is in that, excuse me, within the organization of the system. Again, you can assign machine numbers so that they know how to react with each other. And again, depending on single split or three phase application, we'll make sure that they're operating in conjunction to make sure it's matching your utility requirements and your load requirements. So as opposed to the three phase, or sorry, single phase, this is the three phase example. On the right hand side, you can see the L1 phase, L2 phase, L3 phase, where you can notice it says three P signifying three phase and then one, two, three indicating which position the program is for each individual inverter. Again, just adding more flexibility to your solutions for you and your customers. That said, just talking about different batteries, for an example here, lithium battery connection, showing how you would configure that in the battery type. And actually, I guess we don't have a lead acid slide on here. But that said, we can jump into the different power modes, which really this again is going to depend on your customer's needs, customer's priority. If they are utility connected, whether they have a time of use charge or import export limitations and so on. But again, allows you to prioritize solar first, utility first, leave it flexible with solar and utility having equal priority and similar for output and charging. So again, depending on if you want power to go to your battery first, if you want to go to your loads first, if you want to go to the utility first and so on. Again, a lot of flexibility there. And then again, some working modes showing sort of what that prioritization is based on utility or solar or battery being available. Again, don't want to spend too much time on this because we want to be cognizant of getting through everything. That said, here again, solar versus utility first. This is output priority setting mode. Here we go. So again, remote monitoring, this just sort of shows the data flow between the local communication, the cloud, the shine phone app and the shine server app. Again, whether you want to look at it remotely on a tablet or phone device versus the internet or locally. And again, if you're looking to have either a cellular connection or a Wi-Fi connection. But again, in the upper right hand corner, it just shows some example of power flow, oh, and data for the machines that you would have available to you, both as an installer and as an end customer. And then a couple of project cases showing the application of these different products worldwide. You can see South Africa, Turkey, and Brazil here. As mentioned, you know, we certainly sell quite a number of these products, but we do see a really high adaptation of our min series product, especially in residential use cases. And again, we'll show those in just a moment here. So that said, jumping right into the min. This is the product that was specifically sort of optimized for the US market. It's designed to be a grid tie inverter with off grid backup as necessary during power outages or utility management. So again, you can have it PV only as grid tied. You can have it with a battery, but no backup. So effectively, this is for peak shaving or time of use application. You can then also have the system with an ATS or SIN for partial home backup. So you may have a main, say, for example, XT rear panel with heavy duty loads such as well pumps, pools, and HVAC systems. And then the interior panel can be backed up. You can do that in increments of either 50 amp, 100 amp or 200 amp backup, depending on the application. And then in the lower right hand corner, we have the full whole home backup where the entire service panel would be fed via the SIN, which is an ATS energy management system and smart meter, all built in one. That said, this just shows here sort of the application where again, with the MIN series product in the SIN, you could have two power sources from grid or generator. We're actually also working on an AC coupling function for these systems as well. Not quite ready yet, but long term, our goal is to have the ability to have a third-party PV system also integrated within the backup and off grid. That said, within the inverter and APX battery solution, you could also integrate a EV charger. Here it does note bi-directional. The bi-directional function isn't quite ready yet, but again, similar to the generator function, we're hoping that'll be ready quite soon. And that said, you could either have some DC loads, but again, most people are typically running a protected loads panel. In this case, again, it's showing a whole main loads panel backed up. The solution itself, really popular because again, it has a wide range of application all the way from 3 kilowatts all the way up to 11.4 kilowatts. Again, can typically battery is DC coupled, but again, we have an AC coupled application as needed for folks that already have a PV system, but may not have the roof stringing to integrate directly with the grow watt. Again, have integrated EMS software, so effectively you can prioritize if you're in grid conditioning, maximum self-consumption, backup only, and so on. AFCI protection, just to make sure that you're not having any shorts and that it's up to the latest compliance for U.S. market. By default, the systems will automatically have a communication module or data logger installed, which are either a Wi-Fi and LAN configuration or our most popular variant, which is Wi-Fi and 4G. That said, we can certainly, if you have a customer that purchased a specific unit or had a specific unit installed and you have a concern about the communication or their signal quality once it's installed, you could certainly reach out to our service team and we're happy to help support you if you had to update that communication protocol. But that said, again, the Wi-Fi and 4G tends to probably by about an 80% margin be the preferred unit for most people. And that said, the min series product can use that same shine phone app we talked about a moment ago for commissioning, as well as shine tools, which is an installer optimized application. And again, we'll talk about those a little bit later. That said, this here is the APX high voltage battery. So unlike the SPF, which work on a 24 or 48 volt low voltage architecture, the high voltage batteries would be scaled on a 400 volt architecture. The APX battery is great because it's flexible from 5 kilowatts up to 30 kilowatts. It can allow your customers a low barrier to entry to critical load storage and things like that. But again, if over time they decide they want additional runtime or additional output capacity, you can add additional battery modules to increase the current output and make sure that they're keeping all their loads online, even in the event of an outage. And between both the inverter and the battery themselves, they're both IP66 rated, which means they're resistant to continued water exposure, not submerged, but water rain and splashing, as well as fine dust. So again, it just keeps things simple and also lithium iron phosphate for both thermal stability, puncture resistance, and no risk of thermal run away because of the stable architecture of that battery type. And here, just showing some examples of what the visual appearance of the different configurations look like, we do recommend that you don't exceed five modules stacked high. And again, we just do this for a safety and aesthetic standpoint. You can go up to 20 kilowatts in one array, but if you go over 20 kilowatt hours, we do recommend splitting it into two stacks, again, just to make sure that it's not exceeding height requirements. That said, we do still have stock of our ARO high voltage battery as well. These are single cabinets, which have three battery modules inside. You can see the battery module on the right, they're 3.3 kilowatts per, and you can run up to two of these cabinets per MIN inverter. So your sizing would be from 6.6 to 20 kilowatt, or 19.8 kilowatt hours, effectively 20. And again, designed to basically send and receive power, NEMA 4X rated, so they are designed to be in and outdoors. That said, you know, really flexible solution, 10 year, 6,000 cycle, and field serviceable, field replaceable for easier flexibility. But again, for some customers that sort of have typically, again, if you're just doing a partial home backup, I think these are a great solution. With the new APX, I'm a giant fan of the stackable scaleable units with that going all the way up to 30 kilowatt hours. But again, we have the different options depending on what your customer's needs are, and we're happy to discuss that and cover it with you. That being said, this is a photo of our smart meter. It's designed for up to revenue grade metering, or sorry, not technically not revenue grade, because it's consumption versus production. But that said, accuracy as fine as 0.5% with the Acrel CTs. We do also have the ability to use rigosty coils and slim CTs as well. We can certainly provide the spec to that if you have a unique application case where a standard traditional CT does not fit. But the nice thing about these is you can use them with a PV only or partial home backup for grid conditioning, no export, and so on to make sure that you're meeting the utility requirements. If you do do a whole home backup with an SYN automatic transfer switch, that will actually have a smart meter and auto transformer integrated. So that said, you don't have to buy the additional accessory. It'll automatically measure your import and export values and consumption on the home. And if you do have a system with an SYN and battery backup, you can also see that power management online and on your online monitoring. That said, the ATS itself versus the SYN is, again, just an auto transformer with a 50 or 100 amp backup capacity. It's designed to do partial home backup for critical loads or protected load panel. And again, is scalable depending on what you're looking to do within that property. And again, the SYN designed to be a whole 200 amp pass through for an entire home panel backup also supports generator integration for backup as well. That said, again, ShinePhone app, this is your local hotspot commissioning. ShinePhone again is also something the end customer could use to be able to look at and monitor their system locally if they chose not to use the online monitoring portal. Again, we always typically recommend having the system connected to our server. That allows us to better service both the customer and the installer in the event you guys had a question or needed operational help. If it is online, we can even offer some remote servicing options remotely. But again, if it's not connected to the internet, we would just have to speak you through that. And then beyond that, we also have, again, the Shine server, which is the online monitoring portal. Again, here showing daily and lifetime input, output, export to grid, load consumption, so on, also showing your battery and load charging and discharging profiles, seeing how that looks for you guys. And then we just sort of jump into some wiring examples, depending again, if you're looking to do a partial home backup as you see here with a sub panel and backup loads versus a main panel and heavy duty loads that would drain the battery too fast or possibly overload depending on what circuit was and what the power to the home was. Again, just single line, single line diagram showing the position of the sub panel smart meter, the battery systems inverter and so on. This particular setup, it looks like they are using an SYN 200 amp backup with a sub panel, which again, you can use an ATS or an SYN for a partial home backup, but it would require an SYN if you're looking to do a whole home backup. And then this by comparison is that whole home backup, again, just breaking down the position of the main inverter to the battery packs, the SYN, and the whole home load distribution panel. Again, a lot of flexibility there and our field application team is happy to walk through any designs with you that you might need. That said, jumping over to the inverter installation. So this shows a bit of an image showing how the inverter is set up. Again, the lower half of the cabinet is able to be open to expose everything from your PV inputs, your DC disconnect switch, which is available from the lower left hand side as well, the antenna ports, which come in from the data logger on the terminal block down to the bottom of the inverter. The inverter will come with two antennas for both the Wi-Fi and 4G if applicable. If you have a Wi-Fi on the unit, it'll have one antenna. That said, you have all your inverter bracket on the back, the heat sink to make sure that you're running cool enough. One question that does come up with a lot of installers is around spacing. We do specify a 300 millimeter left, right up and down pathway to allow airflow around the inverter. This number does not stack. If you have two inverters side by side, you would not have to allow two feet between. You can still stick with the one foot as long as you don't have a heat source or other obstruction that might prevent airflow around the unit. So again, another simple thing that allows for additional flexibility and compact installation to make sure you're being mindful of the customer space on their wall. And here's a more clear photo showing that lower disconnect as well as the knockouts. One question that again comes up often is the DC and AC input knockouts that are pre marked there are a three-quarter inch variant. If you do need to use a one-inch variant for your conduit needs in your operation, that's acceptable. It won't cause any warranty voids or anything like that. Again, I know that's something we come up with commonly in the field. That said, all your PV terminals are in the middle center on the lower side. Right above that is the data logger, which is your communication module to the right of that. If applicable, you could have a production revenue grade meter. Again, the standard meter is a 1% margin of error. The revenue grade meter will bring it down to 0.5%. And below that, you have your AC grid interconnection and outputs. And then you also have your backup load output as well. Until the left of that, your battery input. Also, that's your high voltage DC connection. Just showing the PV wiring or battery wiring, all your PV positives will be on the left, negatives will be on the right. That is slightly unique to our product to some of our competitors rather than pairing each string directly. There'll be space between the two terminal blocks. The maximum PV voltage in is a 600 volt EC, but that is essentially your open current voltage. Generally speaking, your target would be just below 500 volts in operating load. That's going to make sure you're getting the absolute most. You can go up to 550, but you will potentially see a little bit of de-rating as you approach that 550 absolute limit. And again, the 600 is the top limit in open circuit current or open circuit voltage. Sorry. The AC grid side, pretty straightforward like most, you'll have your line one, line two and neutral being mindful to also ground the system as well, based on your local AHA and electrical code, pretty straightforward backup loads. Similarly, to the left-hand side, because it is an AC tied connection, it would be right on that same terminal block. And then again, antennas down below the unit. So again, you will notice one is male, one is female, so there's no real way to mix those up. Just be mindful as you mount them. And then jumping into the smart meter. Again, if you have an SYN, it's already going to be included, but if you do have an ATS or a PV-only system, the smart meter will allow you to make use of import/export limitations and also measure power going to loads or to grid as necessary. That said, our CTs are designed to place the arrow facing the load, so away from the grid. With that, obviously you want to make sure your L1 CT is on the same electrical phase as the L1 input for reference on the meter itself, otherwise you could risk having an inverted or reversed consumption number. But as long as you have that facing correct, you should be fine. One thing you can always do is temporarily turn off the PV production to make sure you have a positive consumption value and then re-engage the PV conversion. At which point you'll know that your meter is calibrated properly and your import/export is accurate. One other call-out I always do, just coming from the operations and install side, always do your best to try to make sure your CT is between the meter and the main breaker on the home. Any circuits or breakers that are on the utility side of the consumption in CTs will not be able to be measured by the CTs, so you always want to be upstream of the first breaker on the customer's loads. Here, just showing some of the terminal blocks and how they're wired up, pretty straightforward. Again, your reference AC wiring, your single wiring, and then the CTs L1, L2, and then here it just shows the terminal ports in the bottom of the main control board within the inverter right above the PV input. And again, all of these wiring diagrams would be in the installation manual of the min/product as well as the SPF, so certainly as you go through to install, all that will be in there for your reference. Final, jumping over to the ATSs themselves, this is just an exploded view of the partial home backup ATS unit. As mentioned again, we have two backup sizes, both you well listed, just making it easy for your application. And again, you would just create a protected loads panel to power off of this box. And again, similar wiring diagram showing your input and output of your L1 and L2, and then again, just wire sizing requirements and so on. So pretty straightforward. This is an exploded view of the SYN. So as mentioned before, not only does it have the auto transformer and a main disconnect breaker, it also has a smart meter integrated, also IP65 protection level and UL certified. So that said again, you can use this with either a single phase or split phase output, again, leading to additional flexibility. But the primary application of this again is for a whole home panel backup, also for the ability to integrate a generator if needed. Again, the benefit to that is generally speaking, you don't have a minimum generator size required. However, we typically recommend that the generator be at least two times the capacity of the inverter and ensure that the generator has the capability to power all loads within the home, even if the PV and battery were unavailable. The main reason for this is the SYN will measure the output of the inverter, the generator, and if it's insufficient to power the loads on the home, you could have your system go into a standby. So you always want to make sure there's enough power to power the loads, and surplus could be routed back to the storage system as needed. Again, just some photos showing the bottom of the SYN, the predetermined knockouts that are available for wiring, again, giving you flexibility for installation, and then just the different terminals throughout the machine. Again, all of this will be in your installation manual. Let's see here. Again, I mean, pretty straightforward. RS-485 communications, line one, line two neutral, just making sure you're not having any neutral loops between your protective loads panel and your main panel. Pretty straightforward. APX, the battery itself, again, it's a very straightforward modular design. The uppermost component is the power module itself, which effectively will communicate back with the SYN and the inverter to make sure that battery is being charged and discharged as needed. The battery cells themselves stack below that main unit and come pre-packaged with power and communication cables. Once they are stacked and secured to the wall, whether it be on a wall mount or a floor mount, you effectively would then just wire them in between each of the units and the communication would go back to the main inverter and SYN. Again, it's self-detecting and you would just set the battery from the selection while you were commissioning. My preferred method of doing so is with the Shine Tools app, which makes it super easy. You can select your ESS backup mode as well as your battery type between the ARO or the APX. Very easy application for you. Here again, just showing what the max kilowatt output is, depending on the size of the stack, how many battery modules you have, and again, how on the right hand side, how you would stack them to make sure that they were safe, secure, and not prone to tipping by getting too tall. And again, the wiring diagram here, showing coming from the battery module on the top left, coming down the left hand side, going to the top of the second array and then back down. Again, already pre-cut wires between the battery modules themselves, so the only wiring would be between the inverter and the power module itself. Sorry. And also flexibility around the covers. And again, it's all weatherproof. So pretty straightforward to access wire, just keeping things simple for you guys. And that top module, the power module, would have a DC disconnect as well as a start button on the right hand side as well. And that said, we get down to the point of commissioning, which I will jump off my slide and hand it back over to Tyler as I believe he is planning on showing a live commission for everybody. Great. Good stuff, Ryan. Thank you very much. Super detailed. I think that's awesome. People can look back and review it in the recording for installers and end users. And I know we're a bit over time, so I'm going to demonstrate just how fast it is to commission our residential MIN system. Less than five minutes, really commissioning them, whether you're an installer or an end user. So maybe a little awkward, but I'm going to go ahead and demonstrate just right on my phone screen here. I'm actually going to come behind the camera. So hopefully that works still. You can see we have three applications here. We have shine tools, which is primarily for installers. We have shine phone, which is for the end users, and we have micro, which is actually for the portable power station and consumer grade application. So we're going to go ahead and demonstrate within the shine tools application today. Because if you're an installer installing multiple units, you're going to want that to manage everything. And in order to do the commissioning, we're going to go ahead and select direct Wi-Fi Bluetooth connection so we can connect right up to the inverter. These are the options. We have an MIN inverter just over here in the warehouse, so I'm going to go ahead and connect up to that, select MIN, and it comes up with a photograph to scan the QR code on the side. So I'm going to go ahead and do that. There we go. It automatically recognized the serial number and automatically input it, and we're going with the direct Wi-Fi connection. There it is. You can hit join. And we're in connected to the inverter itself. So this is the main screen here that installers would be seeing in the shine tools application. The shine phone application is a bit more simplified for end users who might want to just see a quick overview. But here in the shine tools app, you can essentially go to quick settings and set up the inverter itself. You can see that we're connected to the grid. You can select different battery types, whether it's the ARO, the APX battery, which Ryan just covered, or even we're compatible with LG batteries for this one. And our off-grid options are, of course, you know, any third-party battery would work. But for this grid-tied, MIN inverter, you can select the grid code here, depending on where you are. You can see which EMS mode we're in, and that can actually be changed on a different screen, but currently we're on load first. Here you can set that pre-PTO mode if you want to. So if we go back, you can actually set the EMS modes right there. Of course, maximum SOC, minimum SOC, and discharge power ratio, if you want to, say, maximize the life of the battery, those can, of course, be changed. And then you can finally see real-time data. And it'll show that we are, of course, connected to the grid right now. Our SOC for our battery is 100%, we're fully charged up, getting power from the grid, and we actually have PV on the roof here as well. 62, well, not producing much at the moment. 60 watts coming in, and nothing going to a load. But that's it. That's essentially the commissioning process. And you can go through the detailed settings if you want as an advanced user on the shine tools. But that's really it. There aren't many advanced settings you'd usually need. You can turn on pre-PTO mode and then be ready to commission when you get approval from the regulators. So that's really it. And I think we're going to go ahead and wrap up here and move on to a bit of a Q&A section. I know I saw some questions in the chat. Possibly Ryan or Furman has had a chance to look those over and answer them. Both Ryan and Furman will go into the Q&A here. How do you guys want to get started with that? Certainly. One thing I did want to call out just because I thought of it at the end when you were speaking, when I did mention the partial home backup and the whole home backup for the MIN series product, one thing I would want to call out is we do have two min models depending on whether you're using sort of a traditional dumb ATS, if you were, the traditional ATS product versus the SYN. You would use a V2 if you're doing a partial home backup with an ATS. But if you are looking to use the SYN product, it would require a V3 inverter. So that is something I did want to call out for the installers in their application. Again, we're happy to review that with any installer before they make their purchase, as I'm sure Ren-Voo would be as well. But I do just want to make that known just so there's not any trouble in the field for customers. Yeah, good point. So that was our V3 MIN inverter there and the SYN full 200 amp backup for whole home. Yeah, maybe Furman, do you want to go through some of the Q&A? It looks like you may have answered some of these already. Do you want to just speak through a couple of those questions? Sure, yeah. So basically, I found a few interesting questions here. The first one being the if load is minimal and the battery is significantly depleted, will it send more charge to the battery? So that depends, basically. I have provided an answer here that we have different operating modes for the inverter that control the energy flow of the PV power to the other sources, the battery, or the loads. So it controls the energy flow in different ways depending on the user's needs and depending on which operating mode you choose. So we basically can choose between either charging the battery at full capacity or exporting the energy to the load or to the grid at full capacity, charging the batteries from solar energy only or using the power for self-consumption only. So yeah, those are the different modes we have. There is a question here that says that's about the best growth system for a completely off-grid home system. So that depends. So basically, all the inverters that we presented today have the ability to operate in a fully off-grid environment and set up. But I would suggest the SPF as the most affordable options and also depending on what type of loads you have for your case, whether you want to use your generator as a backup source only if you're battery simply or if you want to use it as your main source of power. So yeah, feel free to reach out to I provided my email address there. So I'll be able to assist if you provide more details to that. Another question is related to the assistance that are certified to UL 9540. So for the meaning burger, we have the APX, ARO and LG batteries. And for the SPH, we have the ALP and currently we're working well. We don't actually have the UL 9540 yet for the ALP that will come available soon in the next few weeks. And then we're working also with other battery manufacturers like Simplify, Endure and Fortress Power to get those ready if possible. Those will come in Q3, Q4 this year. That's about it. For the questions regarding the availability of product here, I provided contact for contact email to our sales team. And I believe that's all. Yeah, that's all on my side. For some of the product availability questions, maybe eras can jump back in and say what you guys currently have in stock in the warehouse. What are your planned orders? You know, things like that. I think that would be a general great way to wrap up. So installers and end users can possibly come by the warehouse, get some products. Thank you. So we will share with in the follow-up email what we carry and what we have. Obviously, we can also order if we don't have it in the warehouse. We can certainly order it and dropship anything that is needed and is available from grower. One question that I saw there, let me share my screen real quick and I'll answer the first question. Someone asked what if I have a module that is not showing up in your list of modules on your quote tool. What you will do on the first step, instead of having the full system checkbox, you will uncheck it and uncheck the solar panels here. Go to the next page and it will allow you instead of selecting the modules from our list to put your own module. So for example, let's say you want to put the Canadian solar 550 watt, you can just simply put a plugin here, the relevant information, this and the dimensions of the module. And then once you do that, our system will take that into account when calculating the power or the limitations of the inverters or measuring for the rocking that you're selecting here with your sketch and a race. This is the first question there that I wanted to answer. Other than that, just thank you very much. Grow a team for this extended webinar. Now, you can also email our sales team with any questions at info@renwood.com for more information or questions if you have or pricing. As I mentioned before, this webinar is being recorded and we'll send you a link in follow-up email in the next few days with all the information about the product and the recordings. That's it. Have a great week everybody else and see you soon. Yeah, thank you guys very much. Big thank you from Grow a watt thanks to Erez and Peyton over at Renvoo. And we look forward to sharing our solutions throughout the future. Thank you guys. Have a good day. Thank you guys. Bye. Bye. Bye. Bye. Thank you.